Shined her up

Eastsider

Member
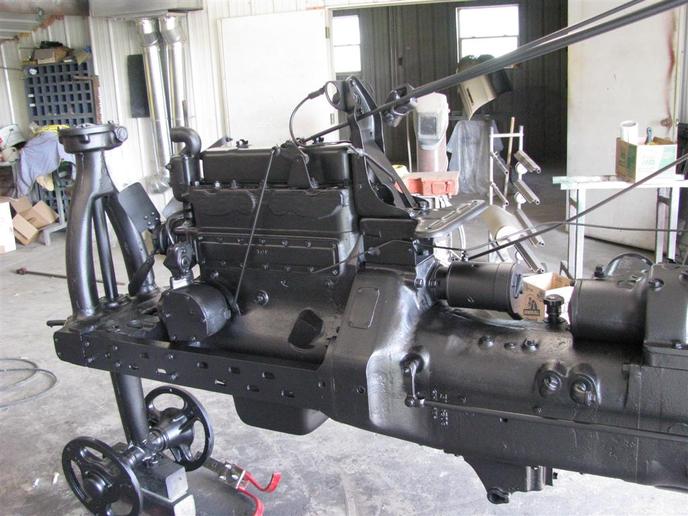
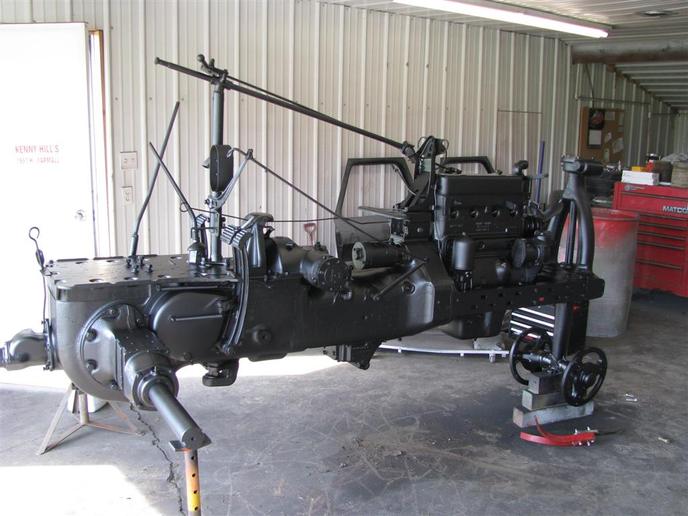
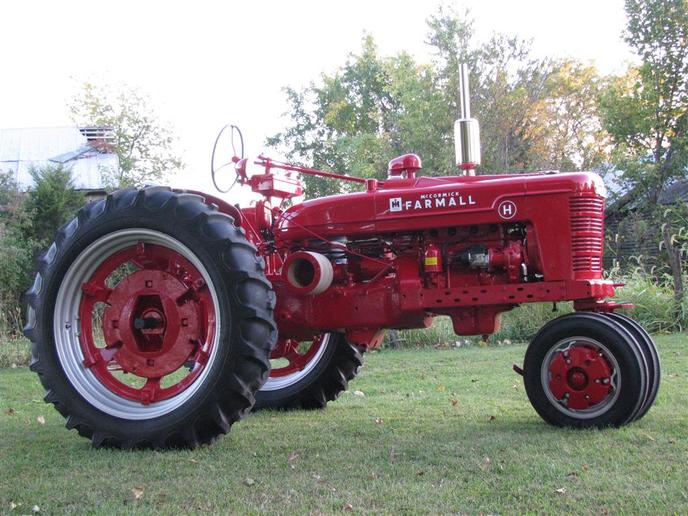
Hi guys...I thought I would share a couple of photos from my seemingly never ending project... I have been working on my grandpa's 1951 H for a while..it was a basket case to start with. After having every possible nut and bolt apart, I finally got the paint on the chassis...man, it sure makes a difference! I decided to try something new, so I bought a 10x20 canopy to paint under...wow! That was the best! It kept the sun off during the painting and better yet, it kept the next morning's downpour and hail off! I used Case IH 2150 with hardener over the Nason Full-Poxy primer. Overall, it turned out pretty well.


<a href="http://s233.photobucket.com/albums/ee79/bigswen85/?action=view&current=IMG_1627.jpg" target="_blank">
IMG_1627.jpg" border="0" alt="Photobucket
</a>

<a href="http://s233.photobucket.com/albums/ee79/bigswen85/?action=view&current=IMG_1648.jpg" target="_blank">
IMG_1648.jpg" border="0" alt="Photobucket
</a>
 
That looks Great. Really nice job!!!!!!!

Now you have to spend the rest of your life keeping it looking like that.

There is always a catch.
 
Looks great. Nothing better than a well restored and beautifully painted H. Here's my
Grandfather's 1949 H that I spent the last few years working on.

They always seem to look so odd in just primer. They're just begging for some red. I used a black epoxy and Nason fulthane single stage.

Please share more pictures if you have taken any.
a19378.jpg

a19379.jpg

a19380.jpg
 
Yours looks like it turned out great too...I have another 46 H of my grandpa's sitting next to it in the shop waiting for her turn next... It is a lot of work, but mostly is good therapy for me after teaching science to middle school kids! Here are a couple of more pictures...the first one is kind of a "before" The next is the during...and the other one is with the next candidate...I just built the shop last year, so it is getting broken in..

<a href="http://s233.photobucket.com/albums/ee79/bigswen85/?action=view&current=IMG_0095.jpg" target="_blank">
IMG_0095.jpg" border="0" alt="Photobucket
</a>

<a href="http://s233.photobucket.com/albums/ee79/bigswen85/?action=view&current=IMG_1183.jpg" target="_blank">
IMG_1183.jpg" border="0" alt="Photobucket
</a>

<a href="http://s233.photobucket.com/albums/ee79/bigswen85/?action=view&current=IMG_1649.jpg" target="_blank">
IMG_1649.jpg" border="0" alt="Photobucket
</a>
 
(quoted from post at 07:38:56 07/27/10) Overall, it turned out pretty well.
I respectfully disagree. Overall, it turned out [i:ec7d41468f][b:ec7d41468f]spectacular[/b:ec7d41468f][/i:ec7d41468f]. Congratulations on doing a great job. Lucky is the H that is yours..... mike
 
&%^$%#$ IT ALL....WARN PEOPLE AHEAD OF TIME TO PUT ON SOME SUNGLASSES OR WELDING GOGGLES BEFORE LOOKING AT THAT THING!!

Gonna have to go see eye doctor now...where do I send the bill??
 
Eastsider,

I like your use of the shop crane like that to hold the rear end up for splitting! I havent seen that before, and am thinking its a pretty good idea for some of the future splitting projects I have coming up....
 
Most of the cleanup was done with a wire wheel...if I could lift it and move it easily, I used the stand grinder...for the heavy parts, an angle grinder with a cup brush. Some parts fit into the bead blast cabinet, but overall I used the grinding method...lots and lots of time, and lots of brake cleaner to rinse it off when done!
 
It was the first time I tried that, and it worked well...as long as the seat is off, it is good to go. Those jack stands with the built in jacks are worth every penny too...I got them at TSC... I should go get more!
 

We sell tractor parts! We have the parts you need to repair your tractor - the right parts. Our low prices and years of research make us your best choice when you need parts. Shop Online Today.

Back
Top