|
| |
| Project Journal - 611B Saga |
| Handle: |
kevinthefixer |
|
| Project Name: |
611B Saga |
|
| Tractor: |
Case 611B |
|
| Started: |
11:04 06/10/17 |
|
| Updated: |
12:42 11/26/17 |
|
|
| Expand/Contract all Journal Entries Show newest journal entry on top |
11:14 06/10/17
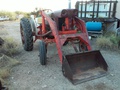
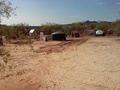
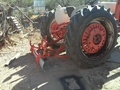
|  11:14 06/10/17 Just beginning 11:14 06/10/17 Just beginningJust acquired this '59 Case 611B rowcropper. Probably paid a bit too much, $2600, but running tractors run expensive around here, not much agriculture happening in the desert southwest. It was in good enough shape to push some dirt up against my fence where the dogs had dug out, but just barely.
| | | Comments | John Deere D
23:42 06/24/17 | Thanks for sharing pictures......:) I have a case 610B that needs TLC. Looks dry in your neck of the woods. | kevinthefixer
19:39 06/26/17 | Yah, dry, and the two-tenths inch we got yesterday didn't help much. Let me know if I can help with your project! |
|
|
| 
11:34 06/10/17
11:34 06/10/17
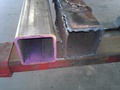
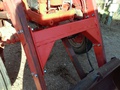
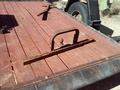
| 11:34 06/10/17 First problems| A good look at the pic above shows the cracks in the loader crossbrace. They are worse underneath the crossbar. I'd originally thought to overlay some angle iron, but it was just too rough, and on closer examination it was too thin also. Now, it appeared to be factory, but it didn't look like the diagram in the manual I have for it, and nothing else on the tractor appears to be underbuilt, so my guess is that this is some aftermarket replacement. At any rate I took a couple hours off and ran into Tucson and found a piece of 1/4-wall steel to replace the cracked piece (made from 1/8-wall square tube). Tacked it together and checked the fit (on Memorial Day!), then buzzed it together. Took about 180 amps to get it hot enough for the welds to sink in, about all my old Craftsman buzz-box will do. | | |
|
| 
11:53 06/10/17

11:53 06/10/17
11:53 06/10/17
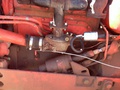
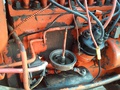
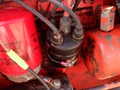
| 11:53 06/10/17 Carb problems?| Having taken care of (I hope) the broken loader frame, it was time to improve the way the motor ran. Before I bought it, when the previous owner first started it up (with a screwdriver across the solenoid!), I'd asked him to push the choke in as it was popping black smoke out the stack. Well, the choke was already off; it's just that the carb was quite ill. I found lots of rust inside, cemented with varnish from old gas, loose screws, degraded gasket--and the main mixture screw in crooked, so that it missed the jet entirely and the carb was set full-on rich all the time. Well, a "budget" carb kit from Steiner and a bit of patient cleaning and we're off and running. Much better. But in the process I discovered the little spring-loaded button inside the distributor cap was stuck up and not making contact with the rotor; ordered up a cap and rotor. Somewhere in there I used about 6 cans of engine degreaser on it before breaking out my old pressure washer. Most of this tractor is orange, whooda thunk it? | | |
|
| 
12:43 06/10/17

12:43 06/10/17
12:43 06/10/17
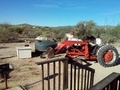
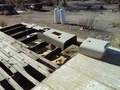
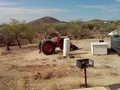
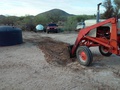
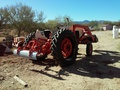
| 12:43 06/10/17 Actual WorkSo after replacing a few electrical parts, so that I could actually start the tractor without having to stand two feet in front of the tire that could squash me easier than I could a roach, I can actually do some work with it. Here I am dumping more dirt on top of the PVC pipe that supplies water to the house; once I get another foot or so over it maybe I can drive over it again. It had washed out to the point where it was exposed, not a good thing in Arizona sunshine.
The other thing that I need a tractor for is cactus removal. Now, in this part of the world we have a particularly nasty sort of a cactus, called a Teddy Bear Cholla or a Jumping Cactus. What I call it would get me kicked off the forum. But I am the proud owner of 4 1/3 acres of the best cholla-producing land in the world; when the price goes up on this stuff, I'll be the rich guy. Unfortunately, that's not likely to happen in my lifetime. These things have hundreds of spines on each detachable pad, barbed spines with a bit of neuropoison on them. Brush up against one and several pads stick to you, painfully. Try to knock them off and they just roll along, driving more spines in. Makes me nervous digging them up even with the tractor, which puts me some eight feet away and above the cactus. However I dug up a dozen or so, and mostly dumped them over the fence.
That was when the tractor mysteriously died. It wasn't out of gas, and it wasn't overheated; the battery was dead, it didn't have enough spark to stay running. I'd thought I'd seen the ammeter showing charge but it isn't any more. Fortunately I had a spare battery in the workshop, and I still don't have the shrouds on the motor, so a quick battery change and at least I could dump the last bucket of cactus over the fence and drive the machine back to the shop. Put the dead battery on a charger (automatic charger please, I don't like the smell of fried battery). Maybe tomorrow will be a good day to diagnose charging systems.
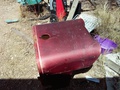
Speaking of shrouds, one reason they are not back on the tractor is that I want to paint them. Hopefully the afterlife will forgive the poor lost soul who decided they'd look good if they sprayed them with metallic purple, but I don't think anyone here will. We'll see if a half-dozen cans of cheap antique white will cover it. Metallic purple and bright orange? Really? And I thought the sixties were bad, Peter Max and all. | | |
|
| 
16:23 06/10/17
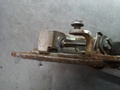
| 16:23 06/10/17 ToDos| Well of course the todo list just got bigger since the charging system isn't working. I'm sure I'll wind up yakking about that later as it seems I've got a case of oral diarrhea (is it oral if you're typing? Well I need the typing practice anyhow). But until that discovery, my main concern was the power steering, or lack thereof. The addition of some lubricants in the steering system helped it a little, but it is supposed to have power steering, and it seems to be completely defunct. Looking at the service manual, the prime suspect is the pump, which is not supposed to be serviceable; it's a Barnes gear-drive, and as far as I can tell isn't available anymore. This may require some serious rigging, IDK. First thing is to rig a pressure gage and see if that's actually the problem. My other concern with the machine is that it's supposed to be a Case-O-Matic drive, that is, there's a torque converter behind the clutch so that you shouldn't need to know how to use a clutch in order to drive it. Well, that torque converter is locked up solid. At this point I have no idea if it's an internal problem or just some esoteric adjustment. And I probably won't even look into it until cooler weather. I only get about 6 to 8 hours of outside time each weekend, by about 10am it's 100 outside and time for indoor (or indolent?) activities. Like posting stuff on online forums. | | |
|
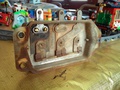
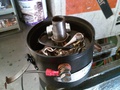
|  | 19:18 06/13/17 Generator and PS pump| Well these turned out easy, at least the bench work went easy. Probably find out how effective this weekend if it isn't too hot, I'm hoping for 2-3 hours each morning to work outside. The generator problem was easy to spot once it was removed: the brushes look plenty tall, but they weren't touching the armature. The spring-loaded levers were stuck on their pivots, apparently just from dirt. I may have blown that in while pressure-washing, I tried to avoid it but... Now since the generator mounts directly on top of the PS pump, it just made sense to pull the pump at the same time. I'd done a quick-and-dirty test on it earlier and discovered that it wasn't pushing any fluid at all, no use trying to rig a pressure gage. Once it was off, I could see why: there was a huge clog on top of the screen at the bottom of the filler tube. I'd thought it was too full to accept any more fluid; there was none in it to speak of at all so it couldn't push out what wasn't there. Took it apart anyway, cleaned it up, it looked pretty good, no rust, gears still good. Find out about the seal when it's back in service I guess, if I have no external leaks and the fluid disappears I'll know it blew out the seal and into the motor's crankcase (it drives off the camshaft gear). Have to find time one day this week to get to Tucson to pick up the paint for the engine shrouds, it's in and that purple is really getting to me. | | |
|
| 
10:21 06/18/17
10:21 06/18/17
| 10:21 06/18/17 gen/PS back in| Got the generator and power steering pump back in the tractor, not that it helped a whole bunch. There is now a slight power assist to the steering, but it's nothing to write home about, it's still hard work to turn the wheel even with the tractor moving. Time to rig a pressure gage. The generator doesn't charge either, but this time I got about 1 volt out of it. One volt positive, so I know it's polarized correctly (I burned up a cheap jumper wire doing that). And so I full-fielded it, and lo and behold, it charges! The wiring between the gen and the regulator seems fine, so it's time to tear down the regulator. If I can't repair that, I'll have a decision to make: do I want to sink $35 (plus shipping) in a new regulator, when I can get an alternator for $100? Possibly cheaper, if I want to do some fabrigging? First things first, see what's wrong with it. If it's just dirty or burnt contacts, well, I'm a dying breed: I actually own a points file. I know how to use it, too. The sheet metal paint is looking pretty good; it turns out that cheap "Touch-'n-Tone" antique white isn't too bad a match for the original Case off-white. Certainly it's light-years ahead of that horrible purple. Since I had just a bit more working time this morning I finally changed the engine oil, too. I knew I had around 15 psi oil pressure, so I was pretty sure I'd find the restrictor tube inside the filter, and I was right--although the original was obviously lost, probably thrown out with an old filter sometime in the last 60 years, but the homemade replacement seems to do the job. If you look close, you can see where someone crimped it near the bottom, presumably to up the oil pressure a bit. So at this point, I need to get it to charge its own battery, hopefully improve the power assist on the steering, and fix the fuel leak. Then I can dress it up with the motor covers and get serious about some cactus removal. Oh, there's lots of refinements I'd like to make but no hurry about them. | | | Comments | kevinthefixer
10:30 06/24/17 | Comments now working! |
|
|
| 
19:24 06/25/17

19:24 06/25/17
19:24 06/25/17
19:24 06/25/17
| 19:24 06/25/17 Regulator working, maybe| Well, I certainly had a sick regulator, but it wasn't just the contacts. Seems the lug that connects to the battery was rusted, and the rivets that hold it on, and the bottom of the frame that carries current to the one contact point. The king of all things electrical, my ohmmeter, told me that it wasn't making contact anymore, imagine that after seeing these pics! Well, I drilled out the rivets and cleaned the rust from the contact points and found a couple screws with nuts to take over for the rivets. They are even brass! Bolted it on, it now seems to be charging. Anyway I saw the ammeter go over to full charge for a minute--before the carb flooded out. Now, it was just about 3 weeks ago I'd rebuilt that carb! Figured I missed some little bit of crud somewhere and it got caught in the needle and seat. Took it back off, took the top off and pulled the float--it's full of gasoline! Both chambers! When I took that carb apart the first time, I had to drain the gas out of the carb, that float had been sitting in it, and it looked and felt fine then. No gas in it, no worn spots, good float. I must have cleaned a microscopic plug out of a hole or three, and it took this long to fill it to the point where it flooded. So I didn't get to do any digging this weekend, except with the pickaxe. Well, that needed doing too. Looks like I missed my goal of getting the shrouds on before our monsoons; the very first one at my place just ended. Temp went from 104 to 70 in a matter of minutes. | | |
|
| 
19:11 07/01/17
19:11 07/01/17
19:11 07/01/17

19:13 07/01/17
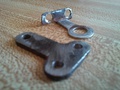
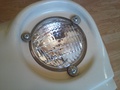
| 19:11 07/01/17 Tractor doesn't like holidays?| Last long weekend, Memorial Day, I couldn't run the tractor because I was still welding on the loader crossbrace. This one, 4th of July, I can't run the tractor again because I'm still waiting on the float. Well, it's supposed to get here Monday the 3rd, maybe I'll get to drive it on the 4th. In the meantime, I spent this morning cleaning up some of the bolt holes that have rusted up. One in particular had me worried, it had a broken-off bolt in it, but I managed to grind it flush, center-punch it and drill it dead center. I'd like to credit my talent and experience for that, but I'm afraid Lady Luck had at least as much to do with it as anything. Either way, when the drill bit hit the end of the bolt, it pushed through something that looked like a Heli-Coil and left me a clean hole. I thought I'd have to drill it all the way out and put a nut behind it. I also got the headlights mounted in the front hood (you can do that indoors even if it's 100 outside). Had to do some rigging here; I found headlamps easily enough, many lawn tractors still use the same ones, but I lacked the retainer rings. I wound up using some of those rubber-sealed washers they use for tin roofs, backed by a steel washer, and #10 sheet metal screws because the #6-32 threaded punched holes were mostly stripped. In all this indoor work I had about all the help I could stand from a certain black member of the household. Outside, I usually get a more moderate amount from a brown one who weighs about 10X as much. | | |
|
| 
19:12 07/06/17

19:12 07/06/17
19:12 07/07/17
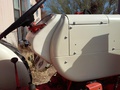
| 18:53 07/06/17 No subject given| You have to admit that UPS is pretty well dead-on with their ETAs. They said they'd have that float here Monday the 3rd, and it showed up at my front gate at 1pm. I had the carb reassembled by 2:30, but it was just too hot out to install it. So I got up early this morning (muggy but not hot; alas, didn't translate to rain this afternoon) and put it in without incident. While I had to wait for the float, I'd thought I fixed a small fuel leak around the sediment bowl, but I was wrong, now it was a steady drip. That at least made it easy to trace, and it turns out it was just the packing on the valve stem, took longer to walk over to the toolbox for a 7/16 wrench than it did to fix it. Fired it up, took out another cactus, and since some clouds moved in decided it was time to put the shrouds back on. The "antique white" isn't too bad a match for the Case "power white", just a little more yellow. This is the first time I've ever seen all these pieces on the tractor, and who knows how long it's been since they were all the same color. There's a down side to having the shrouds on, though. I went down the hollow and got a bucket of dirt (it's so dry now it's like digging concrete), put the bucket over the pipe I'm burying, and lost the tilt hydraulics. Turns out a roll pin got loose and fell out, easy fix, just pushed it back in, but I had to take off a side cover to even see the problem. Half an hour later, dumped the bucket and parked the machine. First time I've ever parked it without having a long list of stuff to fix before I can use it again! Maybe get some more cactus removed next weekend. Oh, there's still lots of stuff it needs, starting with pulling off the fixed lift rod for the Eagle hitch to heat it up so I can adjust the height (it's at 4" instead of the recommended 11), and probably the biggest thing will be rebuilding the steering worm drive. The power steering is working, now, it's quite a bit easier to steer when the tractor's moving, but that worm drive is just too stiff for that little Char-Lynn torque unit. But with any kind of luck I can now start actually using it regularly, instead of spending all my free outside time repairing this or that or the other thing. | | | Comments | YTSupport
15:21 07/11/17 | That tractor looks great with the shrouds. I do understand why so many farmers left them off. Easy to work on. | kevinthefixer
19:36 07/11/17 | Yah, but they are there for a reason (or two). I don't have a shed large enough for a tractor so it has to sleep in the rain. The front grilles keep chaff out of the radiator and birds and bugs out of the air cleaner. That's why I put the headlights in; had to plug those holes with something, might as well be headlights! | kevinthefixer
18:12 08/12/17 | Uh, well, yeah, since it seems I've gone almost 2 weeks without seeing this last comment. I use the ones on the main forums. |
|
|
| 
19:44 07/15/17
19:44 07/15/17
19:44 07/15/17
19:44 07/15/17
19:44 07/15/17
18:31 07/16/17

18:50 07/22/17
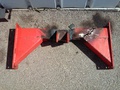
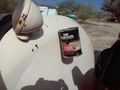
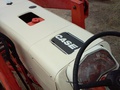
| 19:44 07/15/17 Luxury items and more workWhat, luxury items on a '59 farm tractor? Well, sort of. In Arizona, you have a drink holder in or on everything, it's not luxury it's survival. I know, coffee's a diuretic, but Don Francisco doesn't mind if I use his coffee can to hold a water bottle. Also, I found that I wanted some way to carry a shovel and rake on the tractor, that way I won't set them down somewhere and run them over. My original plan was to weld 1-1/2" pipe caps to the angle and screw 1' pipes into them; did you know that they now want almost $15 for a 1' threaded 1-1/2" pipe? I found an old fencepost laying around, cut it up and used that. It fits on the drawbar perfectly, held on by one bolt in the center pipe so that it can be easily removed if I want to use the drawbar to, like, draw something behind or something. And it's dual-purpose: it can double as a dinner bell! Both these luxury options have drain holes, necessary for stuff that lives outside. Oh yes, and I added a bit of personalization, too, the battery cover was missing its smaller lid and I only want the battery to get wet when I'm cleaning it. Turns out it's just the width of a license plate. Found a Case/IH plate on Amazon, cut the IH off and glued it in place. If I need to get to the battery I can take off the 4 screws, I'd want the larger hole anyway.
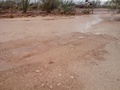
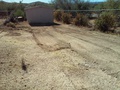
This morning I actually got to go out, start the tractor up, move dirt for about 2 1/2 hours (until it got too hot)(the weather, not the tractor), park it and shut it down without anything going wrong! I worked it pretty hard, too. I'm trying to divert the water that runs in my front gate and washed out the pipe I'm burying to the other side of my water tank where there aren't any pipes. Not only is this not really dirt that I'm digging, it's more like rotten rock (an old scientific term that I just made up), but it's been a driveway for a quarter-century that I know of. So it's very well compacted, and digs like concrete even though we've had over an inch of rain in the last few days. It's truly a job for a backhoe. But I did manage to get a trench dug, maybe 8" in the deepest part, and hopefully smoothed it enough to drive the cars over. However, even if I didn't manage to break anything, the limitations of both the machine and its operator were painfully obvious! After all, a front-end loader is designed to load the stuff the digging machine dug, not to do the digging itself. And the operator, well, I've used loaders before, but I never spent 8 hours in the saddle, and all of them had joystick controls, and they all were on utility frames. This one is a rowcropper with a loader attached as an afterthought, and simply has a diverter valve for the Eagle hitch control valves located next to the seat. So I need LOTS of saddle time before I'm really competent with it. Hopefully I'll live that long. Pretty sure the tractor will, it's doing better than I am, and of course looking better with its new facelift!
Edit 7/16/17: Just got a heavy rain, what we call a monsoon rain around here, 6/10 inch in about 45 minutes. Enough to cause flooding and to test my diversion trench. It works, but there's another smaller rivulet that I need to address, it drains through the same spot and will eventually wash out the dirt I put on top of the pipe. I'll have to think about whether I want to extend the trench another 10 feet or put another one just outside the gate. | | | Comments | YTSupport
11:25 07/22/17 | That is a realistic cup holder on a tractor. All my modern tractors have cup holders that are as deep as something you'd find on a car. First bump and your drink is gone. | YTSupport
11:29 07/22/17 | It's funny that our climates are so different, yet we both have the same problems. My son and I are working on diversion ditches right now, only they will be needed only in the late fall and early spring. July and August are the only times you can get equipment even close to where the ditches need to be. | kevinthefixer
18:56 07/22/17 | Yeah, have a look at the last pic I just uploaded. THAT was a serious test of the trench, and I think I'll just leave it as is. That 3-plus inches of rain came in about an hour and a half, and very little of my raw dirt went away. The trench now looks natural, like it just washed out there. Hopefully it'll keep washing deeper rather than filling in. | YTSupport
10:50 07/30/17 | Kevin, do you think it would be useful to have email notification when a comment is added to your journal? | kevinthefixer
14:38 08/13/17 | Well, yeah, since it's taken me this long to notice that you asked. I use the notifications in the regular forums. |
|
|
| 
19:18 08/12/17

19:18 08/12/17
19:18 08/12/17
19:18 08/12/17
19:18 08/12/17
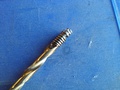
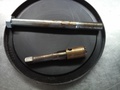
| 19:18 08/12/17 DistributorI'm one of those guys that can't leave well enough alone, if there's some practical way to improve some piece of machinery I'm after it. The 611 wasn't running as smooth as I think it should, got to looking it over for the why. To date I've done next to nothing to the ignition system, haven't even really looked it over very well. Reckon I should have, found quite a few little problems that eventually would have added up to a big one.
To start with, the distributor shaft had a lot of wobble, 30 or 40 thousandth's worth. Opening the points more made the tractor run a little better, but not much, understandably. Points were in terrible shape, too, they didn't even match up straight. The advance springs were stretched out to the point where it was running at least half its advance before it ever touched the springs. Now, distributor parts, bushings and springs and such, are normally not available, you have to buy a rebuilt unit, and I was about ready to bite the bullet and buy one from John Saeli, $255. But John bent over backwards, bought a supply of springs for his business and had me measure my old ones, matched up a couple and sold them to me cheap. He came up with a pair of bushings too. Once again, thanks John.
So now that I have these bushings, how do I install them? Glad you asked. Since this distributor has a 1/2" shaft, I needed a tap just over that size, and it so happens that I have a 14mm-1.25 tap (a standard spark plug size). Run the tap through the bushing, leave it there and beat the combination out with a 1/2x6" bolt. Didn't use a hammer, just ran the bolt up against the tap and tapped the whole shebang on an anvil, out it came without so much as a scratch on the bore. Then I used the same bolt to drive in the new bushing. Hit a little snag here, after pushing in the new bushing it was way too tight. Amazon Prime to the rescue, got a 1/2" reamer delivered in a couple days, ran it through there and it's perfect. There was no significant wear on the shaft itself, got lucky there. Clean and lube everything, might be the last chance ever to do that, install the new springs, points, condenser. Next to put it all back in the motor; fortunately I'm still enough on the ball to remember to mark where the distributor was before I pulled it, I got it as close to TDC1 as I could and put a chisel mark on the distributor body. Tractor fired right up even though I had the timing a bit retarded. It's starting to get hot on me (the weather, not the tractor), so I just set it by ear for now, runs better but has a surge. Huh? So I pulled out all the plugs, and what do you know, one of them has a large, fluffy black thing laying on the electrode. No idea what it may have been in its former life, it's now a piece of pure charcoal, and of course I forgot to take a pic. I also discovered the wrong plugs, forget exactly what they are but not the recommended 3116 Autolite. If there's any rhyme or reason to Autolite plug numbers I've never found it, so I don't know if they are too hot, too cold or what. I have a new set of 3116s for it--but the first one out of the box had been dropped on the electrode and the gap was zero. And of course, out of the dozens of plug gappers I've owned over the decades, apparently the only two I still have are at work. I guess new plugs will have to wait until next weekend.
Anyway after cleaning the old plugs the tractor almost purrs, if you can imagine anything as loud as an old Case purring. I wonder if it was quieter before the fiberglass blew out of that OEM muffler, it still says Case on it. Maybe next year it'll get a new Corvair Turbo muffler, I've done that to tractors before and been pretty happy with the results. You still won't hear it rusting while it runs, understand, but a bit more civilized.
After installing the new plugs next weekend, I need to dump the engine oil and replace it. Seems it's been making oil, and I lost my (very marginal) power steering again--pump's dry. Seems the pump seal leaks badly enough to empty the reservoir in just a few hours. Had to go there, any other place it went would be exernal and obvious, and that explains the extra quart of oil in the motor. That's another thing to add to the list of stuff to do next time I undress the motor, you can't get to those bolts with the shrouds on. But after listening to the motor run this morning, I'm finally getting the feeling that I have a reliable piece of machinery on my hands instead of a wreck looking for a place to have its final meltdown. I don't expect to never have problems with a 60-year-old machine, but it now feels like I can count on it starting next time I go out and turn the key. If, that is, I can remember to turn on the gas first. | | | Comments | YTSupport
21:32 08/14/17 | It's amazing how these machines keep on going when things are wrong. I appreciate the tip on using the tap to remove the bushing. I was planning to use a little puller I have, but it's dicey whether it would damage the sidewalls of the governor casing to do so. The tap sounds like a great idea. You do think outside the box. | kevinthefixer
19:10 08/17/17 | I think it was Groucho who first said that it wasn't hard to live a long time, you just don't bother to die. I picked up that trick because I once bought a cheap Chinese SKS which turned out to have a rough chamber, so rough that the slide would rip the back of the shell off rather than pull it all out after it fired. I forget what size tap it took to remove that 7.62 Russian shell but the steel cleaning rod that comes with the rifle worked a treat as a punch. |
|
|
| 
17:20 09/10/17
13:40 10/07/17
13:40 10/07/17
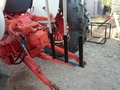
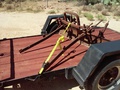
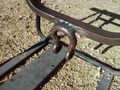
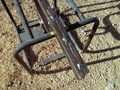
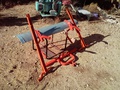
| 17:20 09/10/17 Grader bladeThis should almost have its own journal, but after all it's an accessory for the main thing, the tractor. Been looking into getting a rear blade for awhile now, but even cheap ones are expensive, and used ones simply aren't available around here. Oh, I'm sure there are lots of them rusting away in the backyards of abandoned places, but if anyone takes the time to put them on Craig's List or such they think they're worth as much as when new. Sometimes more. But I found this one, probably qualifies as a genuine antique, but I think it's just a better-than-average job of cobbling something together rather than a brand name piece of equipment. It's designed for a tractor without a 3-point hitch and I'm thinking it pre-dates them. Hopefully I can adapt it, I'm pretty good at fab work. First thing is to soak it daily with penetration oil for a week or two and try to take it apart. I think that if I switch the two arms, right to left, chop them shorter and fab a couple 7/8" studs, it'll fit between the Eagle lower arms. At least one side needs to be adjustable so that the blade angle can be changed, probably don't want it 90 degrees to direction of travel all the time. I'm envisioning three 5/8" holes along each arm to accept 5/8 bolts with a cat-0 to cat-1 hitch bushing on each bolt, and maybe a support strap so all the stress isn't put on the bolt where it goes through the arm. Assuming that works out, I just need to fab an upper support, probably another bolt-and-bushing setup. And lots and lots of scraping, blasting, and cleaning, and a little painting. Don't see much use in putting a real nice high-gloss paint job on something I'm going to drag dirt with. I've known people with mirror-finish black paint jobs on 4WD pickup trucks. HUH?
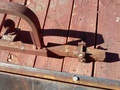
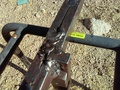
Continued 10/07/17: Got the thing apart, anyway. The more I look at it, the more I think it's a home build, and it just grew rather than being designed and then built. The central bar is a piece of 3/4x1-1/2 steel turned vertical rather than horizontal where the strength is needed. Another piece of the same bar is welded in the middle, with that seemingly useless loop and the tongue for the trailer ball welded to it, then there are two more pieces simply held on to the ends with clamps, apparently because they couldn't clamp the drawbars and the implement itself to just one thickness. So while it hasn't broken, and it has been used enough to show wear on the blade ends, I believe I'll weld it together as one piece all in a line, as laid out in the last pic this date. May not end up any stronger that way, but it'll look better to me, and it'll eliminate those useless clamps that only served to hold the end pieces on until the business end was installed. I've also put the clamps that hold the working parts on in a can full of vinegar, hopefully that will at least keep the rust down to a dull roar, knock it back a bit, but I can't really expect miracles. If I'm right this thing pre-dates 3-point hitches, makes it what, 75 years old? When I found it, it was setting under a mesquite tree. Yeah, it's got a bit of rust on it. But it also pre-dates cheap stuff made of thin steel so there's still a good bit of steel left to it. While I've got the center bar down at the shop to weld it (my welder lives at work), I plan to take in the drawbars also and see if our press will straighten that 2" U-channel. Should be interesting, our press frame is not near as heavy as that channel (except the pressbar), but it has a 10-ton bottle jack on it. Absolutely ridiculous, but it works well for the small transmission gears I need it for. If it moans and groans too much, maybe I can borrow the shop's across the street. | | | Comments | YTSupport
21:16 09/13/17 | That's quite a find. That top brace begs to become part of a 3-point. The cutting edge must be the edge of a dozer blade, much stouter than the normal store bought units. I agree, the fab job is worth a separate journal from the 611b's page. I also agree on the paint, I was thinking of giving my son that for a restoration project and then realized it would be all torn up in no time anyway. Those 4x4s you mention, they aren't for dirt. I'm looking for an early 80s chevy for my new truck, the modern trucks seem too much like my car, and I can't work on it. | kevinthefixer
19:06 09/14/17 | Might be good practice for him anyway. Took me years to learn to shoot paint at a pro level, I tend to get WAY too heavy with the paint. I like to shoot urethane, it forgives a lot of that. As far as a truck goes, I'd like to find one of those Isuzu NPRs, the older style snub-nose dually flatbed diesel with a 5-speed. Lift the cab, sit down on a tire and work on it. Tiny diesel, they got over 20 mpg, and had the cutest little turbo you've ever seen! Looked like a good-sized garden snail. | YTSupport
12:57 09/21/17 | That's a great idea. I didn't think about one of those. An older diesel would still be viable and yet easy enough to work on. My son and I have been thinking just about an 80s Chevy, but frankly, you could probably find an old Izusu with a greater load capacity. I don't mind if it's a bit long, I don't drive a truck to the store. | kevinthefixer
19:30 09/22/17 | I used to work on them for a landscaping company years ago. Liked the simplicity and serviceability. Of course they are not like that anymore, The one the shop has now has automatic, AC, it even has a valve to control EGR cooling, operated by a vacuum servo, operated by a solenoid vacuum valve, operated by the ECM which of course has a temp sensor to control it. Yeah, you guessed it, I know that because it failed, isn't that surprising? | YTSupport
20:39 10/07/17 | You know, that should be easy to turn into a 3-point using it's own steel. That loop makes a natural place to bring a brace from the top link. |
|
|
| 
17:11 10/29/17
17:11 10/29/17
17:11 10/29/17
17:11 10/29/17
17:11 10/29/17

17:11 10/29/17
17:11 10/29/17
17:11 10/29/17
14:57 11/18/17
14:57 11/18/17
| 17:11 10/29/17 Grader blade going slowlyGrader blade goes, but life keeps slowing me down. Making a living. Grandkids' birthdays. Making a living. Automobile maintenance. Making--well, you get the picture.
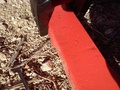
I took all the smaller parts, that is, the brackets and the one bolt I wanted to keep, and soaked them in a coffee can full of vinegar for a week. After that, just a light wire brushing and I had metal. Wish I had a couple 55-gallon drums of vinegar for the big parts, but they're getting the rough treatment with a wire cup mounted on an angle grinder. I hope my under-rated wire cup holds up, I wasn't paying attention when I bought it, it's rated 8500 rpm and my grinder spins 11000. Bad idea, it sheds some wires but so far does the job. One of the brackets had a nut on it that didn't match the other 3. Now, I hate stopping in the middle of a job to go get another wrench just because somebody got lazy and put a different size nut/bolt on because they didn't want to go look for the right one, so I cut it off and welded on a nut the same as the others. The only way I can tell the difference now is by the fact that I melted a lot more nut than the others did. I also burned a lot of rod making the main frame look the way I thought it should. At one spot I filled a 3/8" gap 3/4 deep, I have no idea what they were thinking when they originally built it. Much of it appears cobbled together out of scrap with no real plan or measurement involved. I found an old shackle on a shelf whose pin just fits my upper 3-point link, and I long since learned not to argue with that sort of luck, so it's now welded to the upper bracket. And rather than hold the extra bars to the fixed ones with the home-made brackets they had, I stictched them in place, so it's now as close to a solid 1-1/2" bar as I can make it. Before, it had several points where it was 3/4x1-1/2, oriented weak-side to direction of pull. Somehow I think the tractor has enough power to bend a 3/4" bar. It'll have to work hard to pretzel one that's 1-1/2". That main frame, and both the blade holders, are now husqvarna orange, which as I've mantioned before isn't too bad a match for the original Case orange. I did find a bit of original paint on one of the blade holders, looked like maybe a dark green, Oliver? Fordson? I'll probably never know. As I say, it may be made of parts of several different things of different makes.
Next up is more paint, which means a trip to Lowe's. I need more Husky orange, and I'm thinking the blade itself wants to be machinery grey. I have some class-0 to class-1 lift arm bushings coming, and some 5/8 nuts and bolts to mount them to the drag arms. The drag arms will be the last thing painted, as I plan to loosely assemble everything and mount it to the tractor to set up the geometry, then drill between 3 and 5 holes along the arms to allow for angle adjustment. I'll probably want the blade to push dirt out to the right side, but not too great an angle. Then I will need to rig a bottom support so that the tractor's lift arms pick the blade up, not just the front of the drag arms. Maybe the extra length I cut off the drag arms will make the lower support? Something will work. Then more paint, and look out, driveway! Not to mention the side of the road where the county guys can't seem to make the dirt the same height as the chipseal or the patches they've put on. Oh yes, and I was told when I bought the tractor that there was a problem with the 3-point lift, and reading the forums here it sounds likely the lift cylinder needs rebuilt. You'd think this thing was 60 years old! It actually won't be for another 2 years!
Update 11/18: still moving slowly, but not as slowly as Amazon. I'd ordered some bolts for this project, I think I can use all the same size to hold the big pieces together and hook the lower lift arms to it so I bought a pack of 10, 5/8x2-1/2". Ordered in October, estimated delivery is now December 6. Guess they need to mine the iron first. But if I keep making basic mistakes, it won't make much difference; I just assumed that it fit before, it will now, so I painted it all as soon as I knocked the rust off. Wups. Some of the nice pretty rust-free brackets don't fit over the backbone anymore, 'cuz somebody did some welding on it and didn't grind the welds flat before they painted it. So a bit more grinding and painting tomorrow and I can breadboard the thing together (I hope). Might have a blade by Christmas.
Found the trick to using the wire cup without getting little wires embedded in your flesh. About 15 years ago I bought a cheap welding apron to keep an MSHA inspector happy, right before the mine laid off everybody except a senior skeleton crew. Works perfect for this, I can run that cup in shorts and not worry. But I hope to not do that anymore for awhile; my cheap cup is out of balance, and of course gets worse with wear, and the vibration aggravates my arthritis something terrible. Insulated gloves help but not a lot.
So if I can get it breadboarded tomorrow, next weekend is a long one so I should be able to get all the geometry lined up and drill the holes for the lift arm attachment. At that point I'll be waiting for bolts. | | | Comments | YTSupport
19:33 10/30/17 | I know the drill, farm, truck and YT keeps getting in the way of the fun stuff. But you look like you are making progress, if I didn't know better, you are basically fabricating the whole thing by the time you are done. Now that is fun. I hear you on the wire wheels. I wear jeans then heavy coveralls and have to pick the wires out of both when I come into the house. When that one turns into just a cup with no wires, NAPA and True-Value both have them in their stores. I think they are rated at 13K. I swear by those wire wheels, it just wastes sand to blast before you've run over it with the wire cup. | YTSupport
15:33 11/18/17 | It's really starting to look like an implement. On bolts, I use amazon for many things, but I found boltdepot to be fast and they have an intelligible catalog for fasteners. On the vibrations of the grinder, I hear you, I lose feeling in my fingers sometimes with my old Ryobi. I watched a test of metabo grinders (german made) and they have a balancer that reduces 80% of the vibration. The cost is very high so I won't be getting one soon, but, when one of mine breaks, I'm going to consider it. It's supposed to be a lifetime grinder too. |
|
|
| 
14:51 11/19/17
14:51 11/19/17
14:51 11/19/17
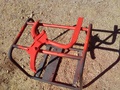
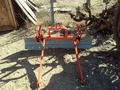
| 14:51 11/19/17 Looks like an implement now| Ground the welds flat and did a little tweaking on the brackets this morning, so now I can breadboard the thing together. I can actually see it working now, at least in my head. Couldn't just add pics to the last post, website said "invalid photo order", so we'll see if making another post works. Chris, did you get the journal size updated? Anyway, I may have to abandon the idea of an afjustable angle, I need both drag arms as close to the 3-pt lift arms as possible. Maybe I can finagle the arms that hold the blade itself to the backbone somehow, but I think I'll worry about that once I get it to drag through the dirt a couple times. I also need to notch out the plate that should have a PTO guard on it, as it won't allow the top link to go low enough, even with the blade just sitting on the ground and not digging into it. I'm sure there will be lots of little things like that that need to be fiddled with. But at least I'll have it set up so that the the drag bars pull directly on the backbone, and the backbone pulls directly on the blade holders, rather than having the brackets to the pulling. All they do is hold the arms in place against the backbone now. Once I'm happy with the performance, I may drill some dimples in the backbone to keep the set-bolts from walking around (I can't bring myself to call a 5/8 bolt a set-screw even if that's what I'm using it for). I will probably break down and buy some extra bolts locally, just because I'm going to get impatient. Anyway I'm reasonably happy with this weekend's progress. | | | Comments | YTSupport
19:39 11/21/17 | Kevin, I'll bump the size by double in the morning. I think we are just long winded, I keep cringing everytime I hit update, because I know I'm going to exceed the limit again. Your blade is beautiful. That photo of the eagle arms down by the arms of the blade looks like it's it looking for the pins. Just a great job. I managed to get a cheap plasma cutter today (since my OA rig is gone), so I'll be trying to catch up to you soon in fabbing. The implement projects are the most fun (and useful). We are going to make a blade for my sons Oliver that is wide enough to work the driveway in a couple of passes. His rear tires are out at 9 foot 4. | kevinthefixer
18:24 11/22/17 | Plasma cutter is way out of my budget, especially for something with einough oomph for work on tractors and implements. Ditto a brake strong enough to bend 1/4 plate, or this 4 1/2' blade would have turned into about 6 1/2. I'd like the blade wider than the wheels, but it just won't make it, my back wheels will only adjust in to about 5'10". Well, if I planned to make my living with it, I wouldn't have bought an ailing 60-year-old tractor, my little cobble job will just have to do for my driveway and maybe a neighbor or two. That foot or so next to the fence will just have to do without grading. Yah, long-winded, and I'm grateful to you and YT for a place to post all this hot air. I used to spend all this energy on Android forums but Droids are all but dead now, tablets are all Windows (!!) and 'phones are all inoculated against customization. Of course I'm a relative noob when it comes to tractors, but I see here that many folks are trying to restore or just maintain their tractors without having any mechanical experience, and once in a while I can help out with that. As well as copying manual pages, I was lucky enough to get all 3 manuals with my tractor. Read your new blog today, I was wondering what was keeping you away from the keyboard, looks like you've got your plate pretty well heaped. If you didn't know before, you probably do now: grounding is the most commonly overlooked part of electrical work. Even some "modern" cars are still coming with ring-terminal grounds to a painted stud spot-welded to sheet metal, not even a star washer underneath. Ground connections on automotive lighting was horrible up 'til about the '70s, when they started putting ground wires in the harnesses instead of hoping the mounting was accidentally grounded. And I don't want to talk about the British pos-ground cars with Lucas electrical. Running joke among British car fans: the reason they drink their beer warm is they all have Lucas refrigerators. | YTSupport
19:02 11/22/17 | That's great about Lucas, my first car (before my Corvairs ;-)), was an AH Sprite, 13 YO when I bought it as an insurance wreck, all Lucas. I disagree on making a living with this stuff. I know a fellow here who does make his rent with a late 50s AC Grader. A lot of folks depend on him since most of our driveways are gravel, if there is any left. I didn't feel I could afford the plasma cutter, but what happened is, I've been saving for one and watching the market. My local welding shop had a reconditioned Lincoln TIG welder, which I figured was many times beyond the checkbook, it was virtually new, and at the same time, they took on a new line of plasma cutters that was a fifth of what I was expecting to pay. They made me a deal for both for a hundred dollars over what I expected to pay for the Plasma Cutter. With the TIG welder, I can turn a fender that was scrap, into $400 item. Three of those and I'll have my investment back, then it's all gravy. As to the brake, I'm making it and just needed a press. I got the ram and press for a song, I think I could have made it though for almost nothing if I could find the channel. The brake is going to be made from old grader blades tips I picked up 25 years ago for free. And as far as the money goes, I won't be able to appreciate that I didn't spend it when dead. What you and I are doing in the shop is fulfilling. You can't ask for more out of life. Yes on the grounds, bad ground is usually at the bottom of every trailer problem I've had and the symptoms can be non-intuitive. | kevinthefixer
18:26 11/23/17 | Corvairs? I realize they're collector's items now. But congratulations to GM, they have the singular distinction of being the only manufacturer to make a product bad enough to spawn the entire consumer protection industry, that product being the Corvair. To be fair, if they'd just corrected the oversteering problem it would have been somebody else that did it. But certainly "Unsafe At Any Speed" fired off Ralph Nader's career. And the first time I ever looked under the hood of a Corvair it had a broken fan belt, and of course my reaction was "no wonder, what kindergartener designed this?" | YTSupport
19:01 11/24/17 | Many a time I spun that thing out when I least expected it, but it was always pushing it in a way you aren't supposed to be driving on the road. They did fix it, my last corvair handled beautifully, and it was quick too for a 6. I do wish I'd kept every car I'd had then, I'd be rich if I sold them now. I had a 68 Camaro, sold it for 1100, I think they go for 70K now. | kevinthefixer
12:47 11/26/17 | No matter how bad, the weakest part of any machine is always the operator. I did some pretty dumb stunts myself back in my misspent youth. Guess they fixed the oversteer too late to stop Mr. Nader though. |
|
|
| 
12:42 11/26/17
12:42 11/26/17
12:42 11/26/17
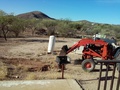
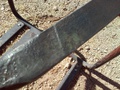
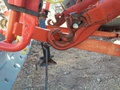
| 12:42 11/26/17 It's a grader bladeSeems like a long time coming but it scrapes dirt now. Once I got to the point where I had the link pins in it all went smoothly. Oh, I had to fiddle with the latches for the Eagle htich, had clearance problems with the drag arms, but that was minor. One thing is clear, the tractor will handle a lot more blade than what I have. in second gear I can't tell it's pulling anything, in fact I can barely tell in 3rd. It would easily pull an 8' blade, but somehow I doubt I'll find one for what I paid for this one.
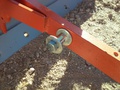
It's no surprise, but I do have a problem with the hitch hydraulics. It holds just fine when lifted all the way up, I had no trouble drilling holes and adding some 1/2" bolts to the two 5/16" ones holding the blade itself to the frame, but if left a foot or so above the ground it fades down in a matter of minutes. And when it fades down it's dumping its hydraulic fluid into the differential-not good. Seems like this would about have to be a problem with the cylinder bore, cracked or pitted or some such, since it holds in one position and not another. That will mean at least honing, and possibly sleeving the cylinder, no way to tell until I tear it down. Honing I can do, sleeving I'd have to find a machine shop. In the meantime I'll just take the blade off the tractor and leave the diverter valve set to the loader lift like I've been running it. So basically I'm back where I started, without a grader, until I get the hydraulics straightened out. I've been meaning to change the hydraulic oil anyway, it appears to be standard tractor juice and doesn't belong in a Case-O-Matic. I have already acquired ten gallons of Dex-Merc, I just need to get the filters and the Eagle cylinder seals. I also have a bucket tilt hose leaking that I might as well replace while I've got it down.
This will probably be the last messing with the tractor this year as I have got to get the place winterized. I have some door seals to replace, lots of plastic to put on windows, some skirting to repair, IDK what else-I've found it extremely hard to think about the cold while looking at 88 degree temps. We had the hottest turkey day ever recorded. Didn't seem to keep the winter bugs down, though, flu season started a month early, and I just picked up a nasty head cold. Might just have been the kids on Thanksgiving, or it might have been the out-of-town couple, or it might just be coincidence, but I got that little patch graded-roughly 1/2 hour saddle time-came back in and just felt lousy. Didn't get a thing done yesterday, spent most of it in bed, got groceries and not much else done today. Man I hate being sick. | | | Comments | YTSupport
14:22 11/28/17 | I hear you on being sick, hate it myself. The blade looks great. I'm jealous of that weather. It's muddy soup outside and it doesn't look like we'll get breaks. I went out to weld and realized my welder had a drip from the leaky roof coming down on it, I thought better of 220 in the wet. Tired of the rain here, and mentioning 88 degrees, that doesn't sound too bad about now. |
|
|
| |
|
| | Return to Journal list |
|
What are Project Journals?
Project Journals are a place where YT Community members can document their tractor and farm projects. Each journal created, can have many photos and accompanying text entries. You can also enable comments to allow other members of the YT Community to comment on your journal. If you do enable comments, it is up to you to moderate what people enter in your journal according to the site policy of Yesterdays Tractors. Journals may also be used as photo posting area, to post your photos of your farm, tractors and related photo topics. If you would like to create a journal, just be sure you are logged in to the Classic View of the forums, and a link will appear to do so when you next come to this page.
. |
Home
| Forums
Today's Featured Article -
Oil Bath Air Filters - by Chris Pratt. Some of us grew up thinking that an air filter was a paper thing that allowed air to pass while trapping dirt particles of a particles of a certain size. What a surprise to open up your first old tractor's air filter case and find a can that appears to be filled with the scrap metal swept from around a machine shop metal lathe. To top that off, you have a cup with oil in it ("why would you want to lubricate your carburetor?"). On closer examination (and some reading in a AC D-14 service manual), I found out that this is a pretty ingenious method of cleaning the air in the tractor's intake tract.
... [Read Article]
Latest Ad:
Super WD9.
[More Ads]
Copyright © 1997-2024 Yesterday's Tractor Co.
All Rights Reserved. Reproduction of any part of this website, including design and content, without written permission is strictly prohibited. Trade Marks and Trade Names contained and used in this Website are those of others, and are used in this Website in a descriptive sense to refer to the products of others. Use of this Web site constitutes acceptance of our User Agreement and Privacy Policy TRADEMARK DISCLAIMER: Tradenames and Trademarks referred to within Yesterday's Tractor Co. products and within the Yesterday's Tractor Co. websites are the property of their respective trademark holders. None of these trademark holders are affiliated with Yesterday's Tractor Co., our products, or our website nor are we sponsored by them. John Deere and its logos are the registered trademarks of the John Deere Corporation. Agco, Agco Allis, White, Massey Ferguson and their logos are the registered trademarks of AGCO Corporation. Case, Case-IH, Farmall, International Harvester, New Holland and their logos are registered trademarks of CNH Global N.V. Yesterday's Tractors - Antique Tractor HeadquartersWebsite Accessibility Policy |
|