
I did not ask this over at the antique-tractor paint section mainly because this is not a tractor.
I am skilled at many things, but score pretty low when it comes to "modern" paint and body work. I did all the tractor painting a two John Deere dealerships back in the 70s-90s. That was low tech and with lacquer primer and one-coat enamel. In fact, we only used paint from John Deere that was made by Valspar.
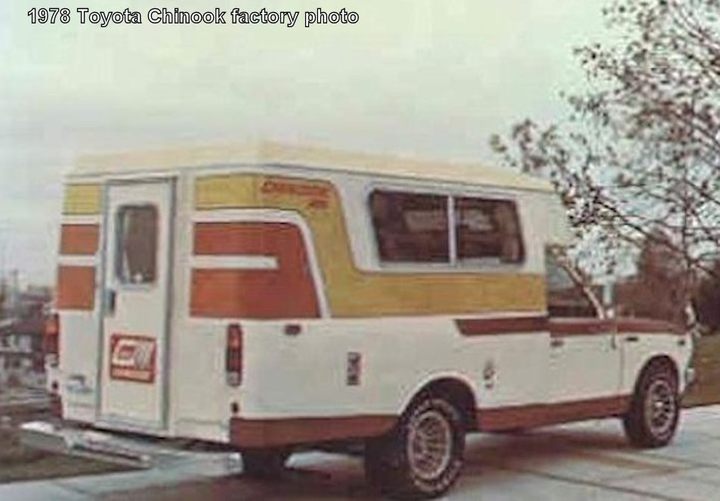
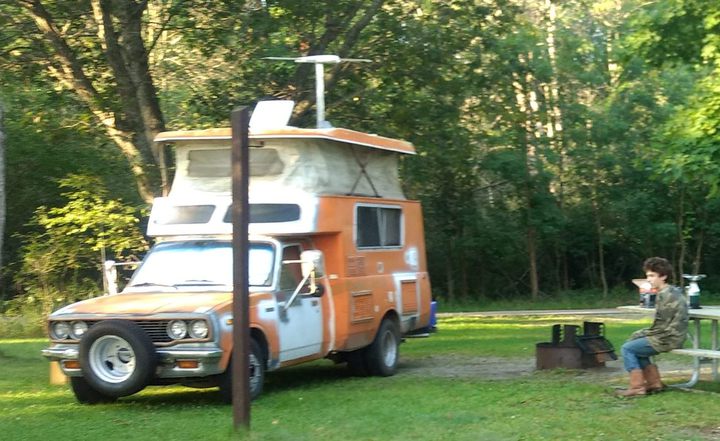
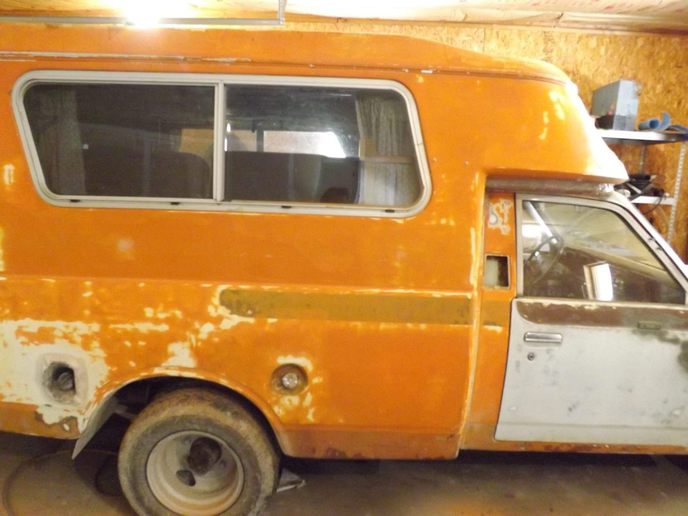
I have a 1978 Toyota-Chinook micro-mini-motorhome. Although it is a collector's item - to my family it is a user. Three adults and a dog do well in it and will be taking it on a 6000 mile trip this Fall. I have no intention of ever making this thing "show quality." That said - the guy I got it from used it in his shrimp-camp in Louisiana and painted it some awful orange with a roller.
I spent four years reworking and/or rebuilding all the mechanics and electronics on this. Drives like an old sports car and gets 22 MPG @ 70 MPH and I find that pretty impressive.
My problem is figuring out how to approach a paint-job now. I have been putting it off every year and figure it is time. It looks awful.
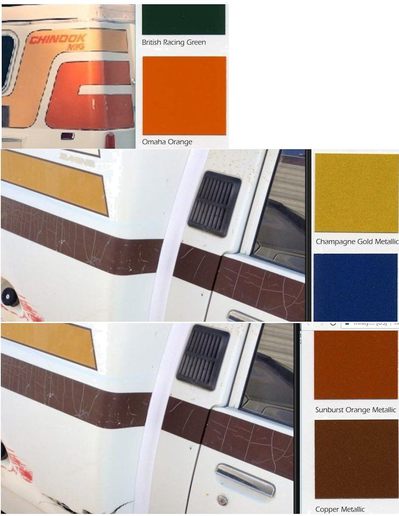
The original paint was lacquer. Four different colors and some decals. I have had new decals reproduced.
I am now trying to figure how to proceed with a one-coat acrylic enamel paint job.
I have no idea how the paint was done originally. I will guess and say the entire base color of white was done first? Then the large bands and/or stripes were painted over the white with a lot of masking? Then decals added?
I have no idea what order will work best. I tried to hire someone locally to do it but gave up. I am kind of amazed at how hard it is to hire anyone to do anything that is not deemed "normal." I could not even get the local auto-glass place to install my windshield because they only do "glue-in" windshields. They acted as though my 1978 with a rubber-molding was a 1900s Model T or something.
So the heck with it. I will reluctantly do myself. I'd just like to have a plan. I already matched the paint with an on-line seller. Local places looked at me like I was nuts when I asked about straight acrylic enamel.
I have urethane primer. Acrylic enamel paint. I also might later clear-coat with more enamel or urethane. Supposedly I can do either.
I would hate to get part-way through this and find out I made some major mistakes in my approach.
If anyone on this forum is really good at this - I'd love to hear some ideas or comments.
I am skilled at many things, but score pretty low when it comes to "modern" paint and body work. I did all the tractor painting a two John Deere dealerships back in the 70s-90s. That was low tech and with lacquer primer and one-coat enamel. In fact, we only used paint from John Deere that was made by Valspar.
I have a 1978 Toyota-Chinook micro-mini-motorhome. Although it is a collector's item - to my family it is a user. Three adults and a dog do well in it and will be taking it on a 6000 mile trip this Fall. I have no intention of ever making this thing "show quality." That said - the guy I got it from used it in his shrimp-camp in Louisiana and painted it some awful orange with a roller.
I spent four years reworking and/or rebuilding all the mechanics and electronics on this. Drives like an old sports car and gets 22 MPG @ 70 MPH and I find that pretty impressive.
My problem is figuring out how to approach a paint-job now. I have been putting it off every year and figure it is time. It looks awful.
The original paint was lacquer. Four different colors and some decals. I have had new decals reproduced.
I am now trying to figure how to proceed with a one-coat acrylic enamel paint job.
I have no idea how the paint was done originally. I will guess and say the entire base color of white was done first? Then the large bands and/or stripes were painted over the white with a lot of masking? Then decals added?
I have no idea what order will work best. I tried to hire someone locally to do it but gave up. I am kind of amazed at how hard it is to hire anyone to do anything that is not deemed "normal." I could not even get the local auto-glass place to install my windshield because they only do "glue-in" windshields. They acted as though my 1978 with a rubber-molding was a 1900s Model T or something.
So the heck with it. I will reluctantly do myself. I'd just like to have a plan. I already matched the paint with an on-line seller. Local places looked at me like I was nuts when I asked about straight acrylic enamel.
I have urethane primer. Acrylic enamel paint. I also might later clear-coat with more enamel or urethane. Supposedly I can do either.
I would hate to get part-way through this and find out I made some major mistakes in my approach.
If anyone on this forum is really good at this - I'd love to hear some ideas or comments.